Before:
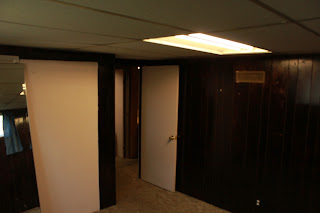
This room was SO DARK. They stained it almost black, so it was just horribly gloomy and...well, creepy. Everything about it was gross - the carpet, the walls, the windows, the ceiling, everything.
Take a close look at the windows if you can...sorry the pictures are a bit blurry. They were covered in tape, sticky goo, stain drips, paint, just overall nasty looking. Like everything else in this room.
Sorry my photography skills were not quite up to par that day, yikes. I couldn't even aim. (Maybe I was holding a baby or something. That happens a lot around here.) See that light spot next to the mirror in there on the left? That is what I call a problem spot. It was a random piece of drywall where everywhere else in the room was paneling. It used to be a closet until weird people went in and changed all the closets and built walls on top of carpets. No, I'm not kidding. We want to take out those walls (only two little ones) and rebuild them properly and perhaps change the layout slightly. We'll see if that ever happens.
Anyway, here are the afters! I seriously get a fuzzy feeling inside every time I go downstairs and see my pretty room! LOL. But really. It was so. bad.
Look at those beautiful (despite a little small) windows! I'm so glad I have an awesome husband that can trim the windows like this for less than $20. We redid the windowsills completely, put new trim on around them, and put on molding on the bottom. Out of all the decorations the curtains were probably the most expensive - I can't remember how much I spent but it was something like $20, plus the rods cost another $15. The little pictures in the first photo are pieces of plywood I had lying around with scrapbook paper glued on and the edges painted. The lamp I got from Target for $5 on clearance, but it was orange. I pulled off the old covering and got fabric at Joann's for about $1.50, and redid it.
So, this is what I ended up doing with my "problem area." I painted it white, put a big mirror in front of it, and got a roll of tulle at Michael's. I tied the tulle into a rope and then glued it around the edge. It works for now at least, I think it's cute. At least cuter than a random hole in the paneling...
So there ya go!! That's all. Now on to the next room...


